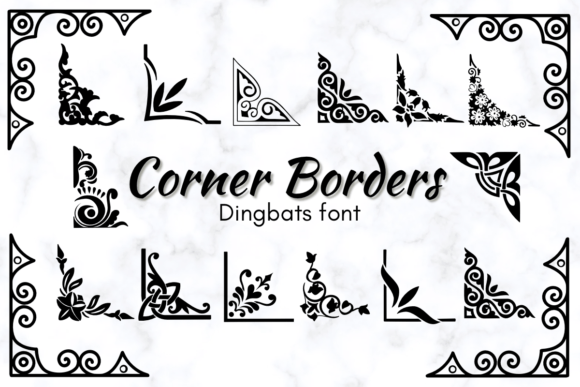
Unlocking the Potential of Corner Borders: A Guide to the Sketched Dingbats Font
In the world of digital design and DIY crafting, the right decorative element can transform a flat, lifeless layout into something truly captivating. Enter Corner Borders, a unique dingbats font characterized by its distinct sketched theme style. Unlike standard vector borders that often feel rigid and overly corporate, Corner Borders offers a hand-drawn, organic aesthetic that resonates deeply with modern design trends. Whether you are designing wedding invitations, creating custom logos, or working on intricate DIY decorations, this font provides a versatile toolkit for adding personality to your projects.
However, because Corner Borders is a dingbats font—meaning it relies on keyboard characters to display images rather than letters—it presents a specific set of challenges. Many beginners and even seasoned professionals often misuse these assets, leading to frustration, wasted time, and subpar results. To get the most out of this resource, it is essential to understand not just how to use it, but how to avoid common pitfalls that compromise the final presentation.
Understanding the Nature of Dingbats Fonts
Before diving into specific mistakes, it is vital to understand what you are working with. When you install Corner Borders, you are not installing a standard typeface like Arial or Times New Roman. You are installing a collection of vector illustrations mapped to keys on your keyboard. When you press "A" or "B" or "1," you might see a delicate floral corner or a sketched geometric frame instead of a character.
The primary interest in this font lies in its scalability and ease of use. Because it is a font file, the borders are vector-based. This means you can scale them up to the size of a billboard or down to a tiny sticker without losing image quality. Furthermore, using them is as simple as typing, which allows for rapid implementation in word processors and design software alike.
The Trap of Context and Legibility
One of the most frequent errors users make with Corner Borders is prioritizing the decorative element over the content it is meant to frame. The "sketched" aesthetic is charming, but it can quickly become visual noise if not balanced correctly.
The Mistake: Overcrowding the Frame
Because the sketched style is intricate, placing it too close to the text body can make the layout feel suffocating. Beginners often align the corner borders flush against the margins of their paragraph, leaving no "breathing room." This results in a cluttered look where the ink-heavy texture of the border fights with the legibility of the invitation or card text.
The Solution: Mastering White Space
Treat the corners as architectural elements, not just decorations. The best approach is to use the Corner Borders to define a zone, but ensure there is significant padding (white space) between the sketched lines and your typography. In design software, use the baseline shift or kerning tools to adjust the position of the border characters relative to your text. If you are using a word processor, utilize text boxes with internal margins set to at least 0.2 or 0.3 inches. This separation allows the hand-drawn nature of the font to shine without compromising the readability of your message.
Compatibility and Sizing Missteps
Another common source of dissatisfaction stems from technical misunderstandings regarding how fonts operate across different platforms and sizes. Corner Borders is designed to be versatile, but it is not immune to the rules of digital rendering.
The Mistake: Ignoring Anti-Aliasing and Size Constraints
Dingbats fonts often contain complex vector paths. When used at very small sizes, such as for body text in a multi-page document, the intricate details of a sketched border can turn into a muddy blob. Conversely, using them at massive sizes can sometimes reveal imperfections in the vector nodes if the font file is not robust.
The Solution: Test and Scale Appropriately
Before committing to a final print, always test the Corner Borders at the intended output size. For wedding invitations, where borders often sit at the edge of a 5x7 card, a font size between 100pt and 300pt is usually ideal for capturing the sketched details. If you are using them for logos, ensure you are working in a vector environment (like Adobe Illustrator or Affinity Designer) so you can manually adjust the points if necessary. Avoid using these intricate borders for small footer text or sub-headings; they are designed to be focal points, not footnotes.
The "Search and Type" Inefficiency
A major bottleneck for users is the method by which they select the specific corner design they want. Typing random keys to see what appears is inefficient and can lead to project fatigue.
The Mistake: Relying on Random Typing
Many users download Corner Borders and immediately start typing "a, b, c, d..." into their design software to see what pops up. This "trial and error" method wastes valuable creative energy and makes it difficult to remember which key corresponds to which design element later on.
The Solution: Create a Reference Sheet
As soon as you install the font, open a blank document and type out every letter, number, and symbol in Corner Borders. Print this out or save it as a PDF on your desktop. This "character map" allows you to visually browse the collection and select the exact sketched corner you need. Better yet, if your operating system has a built-in character viewer (like Windows Character Map or Mac Character Viewer), pin it to your taskbar. This proactive step turns the font from a guessing game into a precise design tool.
Color and Texture Integration
The "sketched" theme of this font implies a certain roughness or artistic texture. However, applying flat, standard colors to these borders can sometimes strip them of their intended charm, making them look like simple outlines rather than hand-drawn art.
The Mistake: Using Stark, Flat Colors
Applying a standard black or a harsh digital color to Corner Borders can sometimes clash with the organic feel of the sketch. It can look too "digital" against a textured paper background, breaking the illusion of a hand-crafted item.
The Solution: Texture Overlays and Muted Palettes
If your software allows, consider adding a subtle texture overlay to the border or choosing a color that mimics an ink or watercolor wash. For wedding invitations, using a dark grey or a deep charcoal often looks more sophisticated and "sketched" than a pure black (#000000). If you are printing on textured paper (like linen or cotton), test how the ink density of the border interacts with the paper grain. Sometimes, lowering the opacity slightly (to 80-90%) can help the border blend more naturally with the paper texture.
Final Checks Before You Commit
Before you finalize any project using Corner Borders, take a moment to evaluate the work with a critical eye. Ask yourself the following questions to ensure you are making the right decision:
- Is the border overpowering the content? The message should be the star; the border is the supporting actor.
- Have I checked for consistency? If you are creating a suite of materials (invitations, RSVP cards, menus), ensure you are using the same corner style (or a complementary set) throughout.
- Is the file format compatible? Ensure your printer or client can support the font file, or convert the text to outlines/paths before sending the final proof.
- Does the sketched style match the event's tone? While versatile, a sketched border fits a rustic or vintage theme better than a ultra-modern, minimalist corporate report.
By approaching Corner Borders with a strategy rather than just enthusiasm, you elevate your work from a simple DIY project to professional-grade design. It is a powerful asset for adding that personal, hand-crafted touch that so many consumers crave today. Use it wisely, and it will serve you well across countless creative endeavors.